The dispute over territory in South Africa was long and arduous for the British, though of the many struggles, two battles - fought within a 24-hour period - stand out. In 1879, the British were keen to expand their control over land in the Kwazulu-Natal region of South Africa, particularly encouraged by a diamond rush that saw many European colonists entering the area to mine for precious gems. To aid British dominion over the newly-discovered diamond mines, the British government instructed that Sir Bartle Frere, the High Commissioner for Southern Africa, begin diplomatic proceedings with the local populace, feeling that a war would be costly and unnecessary. However, acting on his own volition, Frere instead issued an ultimatum to the Zulu King Cetshwayo, knowing that the King could not agree to the terms, and that war was inevitable. When King Cetshwayo did not comply within the month allocated, the British soldiers stationed in South Africa declared war, and the Zulu prepared for battle.
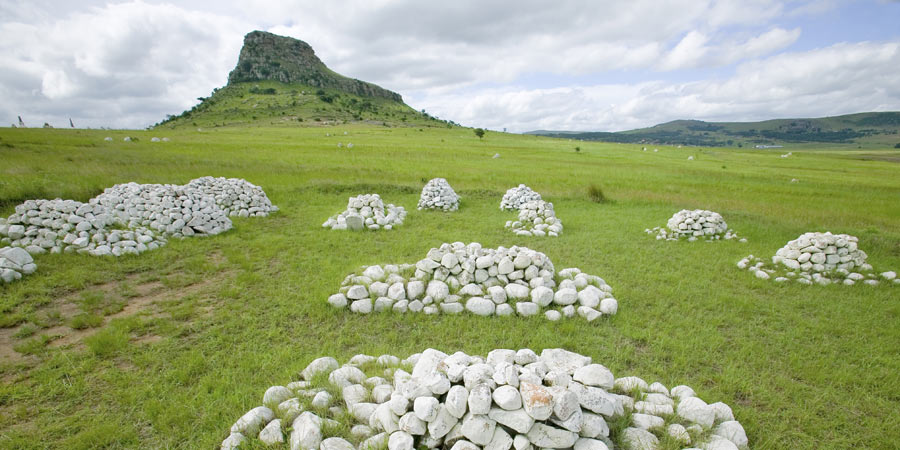
Led by Lord Chelmsford, head of the British military presence in South Africa, the Zulu-Anglo war began in January 1879, as the British marched through the area, searching for the Zulu army. Initially, Chelmsford believed that the native forces would not engage in battle, though his underestimation of his enemy proved fatal: far from having retreated, the Zulu army were lying in wait for the opportunity to strike. Using the 'Bull's Horn' formation, some 20,000 Zulu men descended on 1,800 British soldiers based at Isandlwana, who, despite superior weaponry, succumbed to the tactics and sheer force of the Zulu warriors.
A small number of British soldiers managed to flee the scene, retreating to Rorke's Drift - a better-known site of the Anglo-Zulu conflict. Situated in British territory, Rorke's Drift was home to a mission hospital, and at the time was already home to a number of sick and wounded patients. The initial plan by escapees from Isandlwana, along with panicked men stationed at Rorke's Drift - many of whom were not trained for battle, but instead were part of engineering or other non-combatant corps - was to run from the approaching Zulu. However, an experienced officer named James Dalton advised against fleeing, pointing out the number of sick and injured would make escape cumbersome, knowing first-hand the dangerous ability of the Zulu warriors. Instead, supplies were used to form makeshift fortifications, with walls made of flour bags and biscuit tins, steel bedframes used as barricades, and every man able to walk armed with a rifle.
The battle lasted ten hours, during which time an estimated 19,100 bullets were spent by the British, the thatched roof of the Rorke's Drift hospital was set on fire, and the Zulus lost 850 men. By contrast, the British suffered only 17 fatalities, and a similar number of casualties - leading many to claim the battle of Rorke's Drift a success. In reality, the 24 hour period during which the battles of Isandlwana and Rorke's Drift were fought proved to be one of the most embarrassing periods in British military history, with Isandlwana the worst defeat ever suffered by the British army to a technologically inferior opponent. Further, British contention over South African land was far from over, and in later years, the Boer War would be fought against Dutch colonists (Voortrekkers) and the native tribes allied to them, in an effort to secure British dominance in the region.
To explore the battlefields of this fascinating period of history for yourself, why not consider our brand new Kwazulu-Natal Battlefields & Big Five tour? Discover the sites of poignant conflicts, and uncover the incredible wildlife of South Africa on this inspiring tour.


